
Science fair projects for kids are one of the favorite teaching methods. These activities are all easy to try for anyone, and you have virtually all the things you need. Select a handful of your favorites to start the fun of science!
Easy Science Fair Projects
Construct a water clock
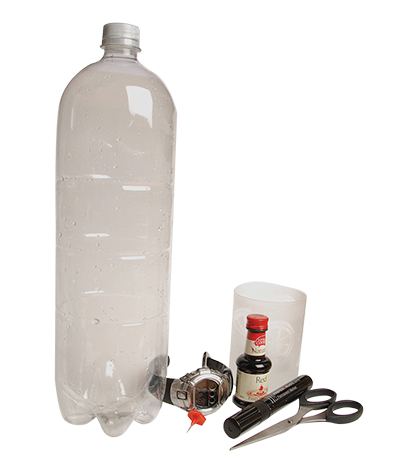
Requirement
Big, clean plastic bottle
Scissors
Drawing pin
Marking pen
Food colouring
Stopwatch
First step
To start, measure approximately halfway through the bottle, split the bottle into two with the scissors gently. So ask an adult to help. It may be difficult.
Second step
Now, screw off the top of the bottle with the drawing pin and make a small hole there – ask an adult to help. Then place the lid on the flask again.
Third step
Next turn upside down the top half of the bottle and insert it in the lower half, so that the top of the bottle goes down.
Fourth step
Now, blend a few drops of food in a pint of water, then get your stopwatch ready!
Fifth step
Pour the water into the bottle top and then begin the time. Mark a line at the bottom bottle water level every time one minute goes by.
Sixth step
Once the entire water has gone into the bottom, add the water back to the top half and count as the water pours down for a few minutes. Clever!
Test PH using cabbage
First step
Peel off three or four large cabbage leaves and place them in a mixer full of water. Mix the ingredients together until the cabbage juice is purple.
Second step
Pour the purplish cabbage juice through a strainer. To sift out all of the huge bits of cabbage. Keep the liquid for the tests to follow.
Third step
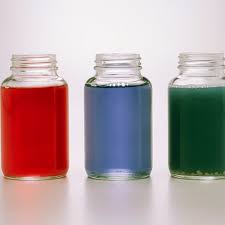
Set the glasses out side by side, three glasses. Fill every glass with cabbage juice, for about three fourths.
Fourth step
In the first glass of cabbage juice, add a little vinegar. Add a spoon and note that the vinegar is classified as acid. Which means the hue changes into red. When combined with cabbage juice, all acids become red.
Fifth step
Add a teaspoon of soda or detergent in the second glass. Notice how the liquid becomes green and this chemistry is a base.
Sixth step
For future reference, preserve two glasses of red (acid) and green (base). To illustrate a neutral solution hue, fill in the third glass of purple cabbage juice.
Result analysis
The result for this science fair projects. Certain materials are classed as an acid or as a base. Conversely, acids and base– acids have a low pH while bases have a high pH. Water (neutral) is referenced to have a pH of 7 at 0-14 scales. By means of an indicator, scientists can determine if a chemical is an acid or a bases. Typically, an indicator is a colour-changing chemical in which an acid or a base comes into contact.
The purple cabbage juice, as you can see, changes red when it blends with acid and turns green when mixed with bases. Red cabbage juice is regarded an indication. As it demonstrates something about other components’ chemical composition.
What does the cold lead to? What is it? A water-soluble pigment, anthocyanine, is found in the red solution which changes its color when treated with an acid or bases. In acidic settings, the pigment turns red with a pH of less than 7 whereas the pigment is bluish-green with a pH of more than 7.
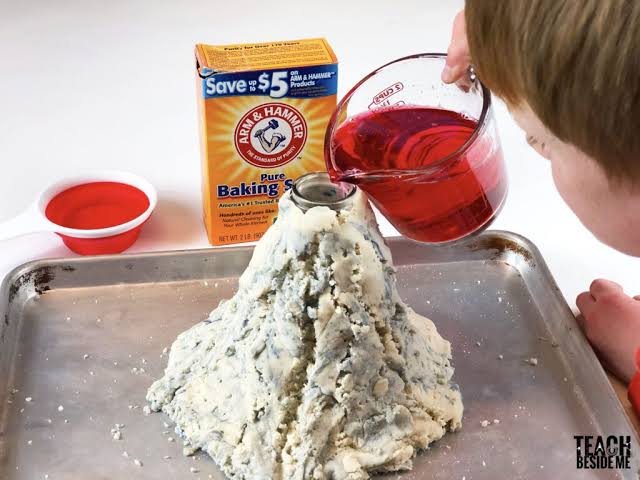
Baking Soda and Vinegar Volcano
Instrument
- 10 millimeter of dishing soap
- 100 millimeter of warm water
- 400 millimeter of white vinegar
- Coloring for food
- Baking soda slurry (fill a cup about half with baking soda, then fill the remainkng baking soda with water)
- Empty 2ltrs soda bottle
First step
In the empty soda bottle, add vinegar, water, soap and 2 drops of food coloring
Second step
Use a spoon to stir the slurry of the baking soda until everything is liquid.
Third step
Eruption time! Pour the slurry of baking soda into the bottle of soda fast and step back!
Result analysis
This amazing science fair projects explains. “A chemical reaction is caused by a gas known as carbon dioxide between vinegar and baking soda. Carbon dioxide is the same type of gas that is used to produce soda carbonation. What if you mix a soda up? The gas is becoming highly excited and is attempting to spread. There is insufficient space in the bottle to disperse the gas, and hence it leaves very fast via the opening and causes a eruption!”
Extract DNA from an onion science fair projects
Materials
- an onion;
- 100 millimeter of a solution of meat tenderizer. (0.05 grams / millimeter water) and dishwashing liquid (0.01 millimeter / millimeter water);
- 50 millimeter 95 % ethanol stored in the freezer or on in ice;
- ice bath;
- cheese cloth;
- glass stirring rod;
- five test tubes;
- 250, 500 and 1000 millimeter beakers;
- blender;
- scale;
- water bath @ 60º C;
- stopwatch.
Procedure
Step 1: Chop the onion. Chop the onion.
Step 2: In a 250 mL beaker, add the meat tenderizing solution (100 ml), and heat to 60°C in a bath of water.
Step 3: In the meat tenderizer solution, add 50 g chopped oignon. Remove and let settle at 60oC for 15 min.
Step 4: Remove the beaker from the bath and put it on ice for 5 minutes immediately.
Step 5: Give the blender mixture.
a) Mix for 45 seconds at low speed and stop.
b) Mix for 30 seconds at high speed and stop.
Step 6: Put the mixture in four pans folded and covered with a 500 ml beaker, already on ice.
Squeeze the filter off slowly.
Result analysis
When the stringy material bubbles out of solution (the DNA), the glass rod in the test tube is twisted gently to collect the DNA. It can now be used to test or manipulate genes.
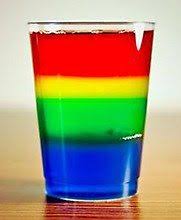
Marvel at a density rainbow science fair projects
Materials
- Sugar
- Water
- Food coloring
- Tablespoon
- 5 glasses or clean cups (glasses)
Procedure
First step
The first step for this science fair projects. Line up five glasses. To the Five glasses. Add to the first glass 1 table cube (15 g) sugar, 2 tablespoons (30 g) of sugar to the second glass. 3 tablespoons (45 g) of sugar to the third and 4 sugar cubes (60 g) to the fourth glass. The fifth glass should be empty.
Second ate
In each of the first four cups, add 3 tablespoons (45 ml) of water. Stirs each of the solution. Add one tablespoon (15 ml) additional to each of the four glasses if the sugar does not dissolve in any of the four glasses.
Third step
Add 2-3 droplets of the first glass of food coloring to the red food. The second glass of yellow food coloring. The third glass of green food coloring and the fourth glass of blue food coloring. Stir the whole solutions.
Fourth step
Now let us use the varied density solutions to produce a rainbow. Fill about a quarter of the blue sugar solution with the last glass.
Fifth step
Lay a little green sugar over the blue liquid carefully. Put the spoon in the glass slightly above the blue layer and slowly pour the green solution over the spoon back. You won’t affect the blue solution much if you do this appropriately. Add green until the glass is approximately halved.
Sixth step
Now lay the yellow solution on the back of the spoon, above the green liquid. Three-quarters full, fill the glass.
seventh step
Finally, overlay the yellow liquid with the red solution. Fill the remaining glass.
Crystal easter egg science fair project

- An egg
- 1 cup of hot water
- 4 tablespoons of alum
- A pin or a needle
- Food coloring (not compulsory)
- String (not compulsory)
- Cup
Procedure
First step
Put into a glass 1 cup of boiling water.
Second step
Remove in 4 alum tablespoons. Continue to whisk until the alum is dissolved.
Third step
Add a few drops of food coloring if you want colorful crystals. The eggshell is easy to collect colour, so that a little color goes a long way.
Fourth step
Place the egg in the glass and cover it entirely with liquid. You must plunge the egg into it until air bubbles escape, or if your egg is bleeding, you must plunge it in. If you like, a pipe-cleaner or string may be used to suspend the hollowed egg.
Fifth step
Allow for crystal development for many hours. When the crystals are satisfied, take the egg, hang it, or put it on a towel of paper and let it dry.
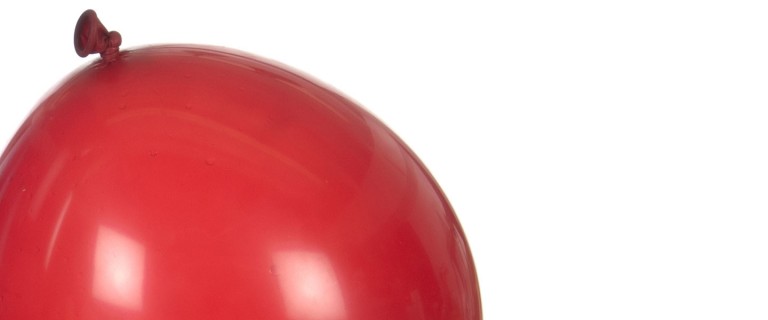
Blow out a candle with a baloon
First step
Blow up a ballon like you would normally and knot it off.
Second step
Put in the center of the table a lighted candle.
Third step
Put your safety glasses since the ballon will be popped. Keep a foot or two of the balloon above the top of the flame and bring it steadily closer and closer to the fire until it is burning. Before the heat dissolve latex and ballon bursts you will see the flame does not even contact the ball. Just say that you have to prove what you know already.
Fourth step
Let us repeat the experiment, except this time there’s a layer of water inside the ballon’s floor.
Combine the balloon with water to the top – it probably carries a few ounces, which is 60 mL for you scientists – then blow it in the air thereafter. If you let the ball fly by mistake before you tie it down,
You and your pals are going to spray themselves
It’s going to adore. Tie the balloon and prepare yourself for the next move.
Fifth step
Keep the ball water-filled up and gently drop it over the candle, and see how people start running. All of you know it’s going to pop, but it doesn’t for some odd reason. You can really enable the flames to contact the floor of the ball if you’re extremely daring, but they still don’t burst.
Sixth step
Remove the heat from the ball and check the soot in the base carefully. Yes, there’s soot, but it didn’t come from the balloon. Try to find out why the water layer stopped the ball from popping before reading the explanation.
Result analysis
Water is an excellent heat soaker. The tiny latex balloon makes it possible to heat the water very fast and hot. As it heats up next to the flame, it starts to rise and it is replaced by cooler water on the ballon bottom. This colder water then absorbs more heat and continues the process. Actually, the water exchange occurs so regularly that it stops the ball from popping. It takes the heat of the flame until it is higher than the heat of the waters to remove the latex from the ball. But watch out! But watch out! If you turn the ball such that the flame of the candle is on the side of the water, the ball pops because the water is there
Make a simple Newton cradle
Instruments
- Jumbo Craft Sticks
- (6) Marbles
- String
- Scissors
- Glue
- Tape
- Pencil
- Hot Glue Gun/Glue
Procedure
First step
Glue (4) craft sticks to form a square at the corners. Repeat with four additional sticks of crafts. Let it dry. Let it dry.
Second step
Cut string into six equal pieces approximately 8inches long
Third step
Marble hot stick to the middle of one of the string sections. Repeat to end with (6) distinct marbles, each of which is attached to the string center.
Fourth step
Make (6) sticks with two 1⁄2″ crafts. Ensure that the markings are focused on the sticks.
Fifth step
Tape one end of strings of marbles tied to each mark along one of the craft sticks. Set aside, set aside.
Sixth step
Assemble the frame with hot glue. Make a craft stick perpendicular to each corner on both sides and hot glue.
Seventh step
Clebe the craft stick on one side of the frame with the taped string/marbles.
Eight steps
Stick on the other side of the frame to the second designated craft stick.
Ninth step
Ape with a marble connected to the designated craft stick on the free end of each thread. Tighten the strings carefully to ensure that the strings are aligned. When viewed from above, the marbles must line up both horizontally.
Drop an egg to prove the first law of motion

Procedure
First step
To execute the demonstration, use a robust table or counter surface. Fill the glass with water and position the pastry pot over the glass for about three quarters. Put the cardboard tube on the cake pan vertically, putting it over the water immediately. Put the egg on top of the carton tube carefully.
Second step
Explain to your audience that it is the aim of getting the egg into the water glass, but that you cannot touch the egg, the carboard tube, or the water glass. All you have to touch is the pastry bowl. What should you do to remove the pie pan and the carton tube to get the egg to the glass of water? This is true. Sir Isaac Newton’s First Law of motion will be invoked and the pie pan will be swept off the way . Read the following step. Don’t do it yet.
Third step
Just stand behind the Egg Drop configuration. If you’re right, just hold your right hand like you would karate anything. Place your hand around 6 centimeters from the pan edge. The goal is to whack with enough power the edge of the pie pot to knock the carton tube out of the egg. The rest takes place, as the egg straight falls into the water glass.
Result analysis
Sir Isaac Newton and his First Motion Law. He must be credited for science fair projects. Newton argued that moving objects desire to go, and stationary objects want to remain – until an external force acts on them. So, because the egg doesn’t move when it rests above the tube, it doesn’t go moving. You put enough power into the pastry pot to get it out of the carton tube. (there isn’t much friction between the pan’s surface and the water container). The edge of the pastry pot grabbed the lower part of the tube and flew with the pot.
Conclusion
We hope that the scientific fair projects here will encourage them to have fun, study science, and at the same time be creative whether your child has never taken part in the science fair or is an old pro.